
Introduction
Let’s be honest—fishing tech can get pricey. You walk into a store or scroll through Amazon and spot a shiny new fish finder for $400. Suddenly, you’re wondering if you’re buying a fishing gadget or funding a NASA expedition. But here’s the thing: you don’t have to empty your wallet to find fish.
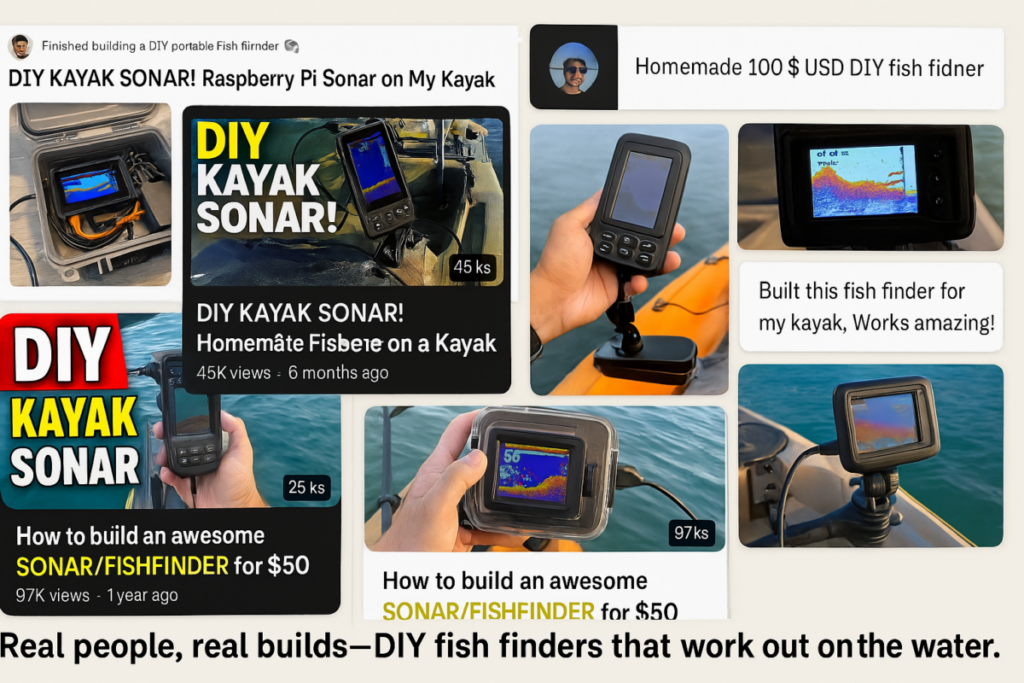
Lately, there’s been a big wave of DIY fish finder builds popping up across fishing forums, YouTube channels, and Reddit threads. Folks are grabbing their old smartphones, microcontrollers like the Raspberry Pi, and a few sonar parts, then piecing together gadgets that actually work out on the water.
So, is it worth the effort? Can a budget DIY fish finder hold its own against a commercial Lowrance or Garmin? We’re going to look at the real differences—cost, performance, ease of use, and build time—to help you figure out what’s right for your tackle box.
This guide is for the weekend tinkerers, the bank-side DIYers, and the budget-focused anglers who want to know if they can save a few bucks without skimping on results.
Along the way, we’ll cover:
- What goes into a homemade fish finder
- Whether DIY builds are actually accurate in freshwater
- The gear you need (with links)
- Step-by-step build instructions
- Common hiccups and how to fix ’em
- Real success stories from the fishing community
By the end, you’ll have a pretty good idea whether it’s time to break out your soldering iron or just hit “Add to Cart.” Either way, you’ll be armed with the info to make the right choice for your style of fishing.
If you’re interested in exploring current DIY fish finder projects, Reddit hosts several active communities where enthusiasts share their builds and experiences. For instance, in the r/Fishing_Gear subreddit, users discuss budget-friendly fish finders and DIY setups. One user suggests the Garmin Striker 4 as a reliable option for under $100. Another user shares their experience building a fish finder for under $75, detailing the components and steps involved.
Additionally, in the r/kayakfishing community, there’s a thread where members showcase their fish finder battery box setups, offering inspiration for DIY enthusiasts.
For more insights and real-world examples, you might explore these communities:
These forums are rich with user-generated content, including photos, build guides, and discussions that can help you in your DIY fish finder project.
What Exactly is a DIY Fish Finder?
If you’ve ever thought, “I bet I could make one of these myself,”—you’re not alone. DIY fish finders are exactly what they sound like: homemade setups that use basic sonar sensors and microcontrollers to help you spot fish without the hefty price tag.
The cool part? These builds can be surprisingly simple or borderline genius, depending on how much you want to tinker.
The Basics Behind It
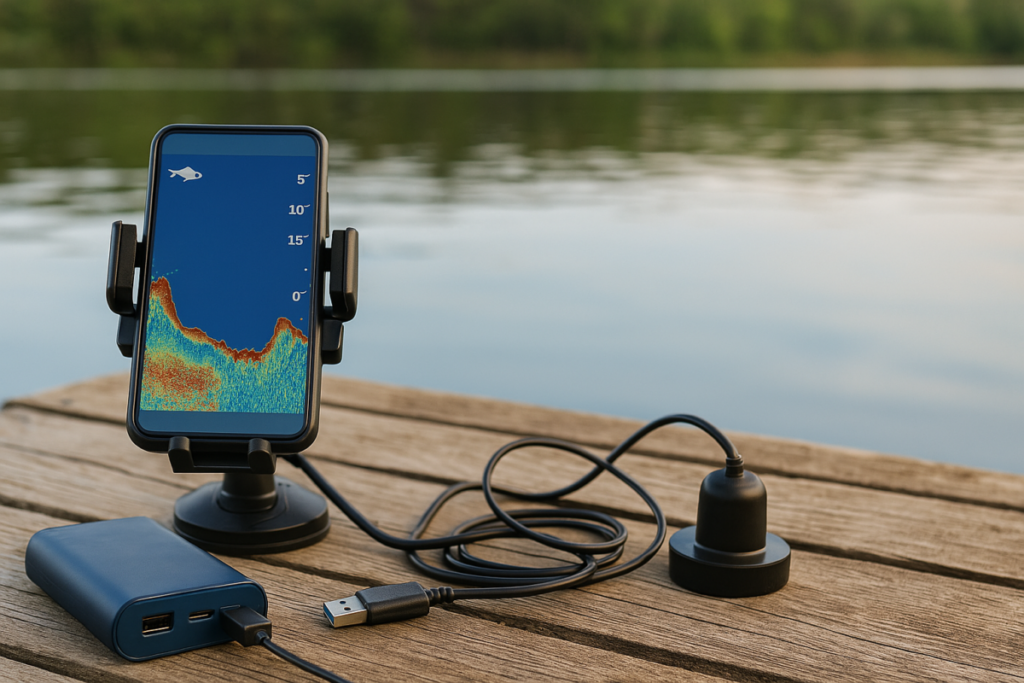
Here’s the gist: a typical DIY fish finder includes three main parts:
- A sonar sensor that sends out sound waves and reads echoes back
- A microcontroller (like an Arduino or Raspberry Pi) to process those readings
- A screen or smartphone to visualize the data
Depending on your setup, you might add things like GPS, waterproof casings, or a mobile app that connects via Bluetooth or Wi-Fi.
Popular DIY Setups
You’ll see three main styles folks are building these days:
| DIY Setup Type | Estimated Cost | Skill Level | Power Source | Best For |
|---|---|---|---|---|
| Raspberry Pi + Sonar Module | $60–$100 | Intermediate | Battery pack | Kayak or small boat setups |
| Smartphone App + Castable Sonar Ball | $30–$80 | Beginner | Phone battery | Bank fishing / shore casting |
| Arduino-Based Sonar with LCD | $40–$70 | Beginner–Intermediate | 9V or Li-ion battery | Ponds, shallow lake fishing |
You can easily grab a full starter sonar sensor kit for under $25, and pair it with a used or cheap microcontroller to keep your build well under $100.
And no, you don’t need to be a coder. Many of these projects use free, open-source code and step-by-step guides (we’ll link some of those in the “How to Build” section later on).
Why Go the DIY Route?
There are a few reasons why anglers are skipping the fancy gear and rolling up their sleeves instead:
- Cost Savings: Even a basic Garmin Striker 4 will run you over $100, and that’s on the low end.
- Customization: Want to mount it sideways? Add a solar panel? Build it into a tackle box? Go for it.
- Satisfaction: There’s something seriously rewarding about fishing with a gadget you built yourself.
But maybe most important of all? You get to learn something. Whether it’s basic electronics, waterproofing, or just figuring out how sonar works, this kind of project builds useful skills—and that’s a win, fish or no fish.
Coming up next: We’ll get into the latest trends in DIY fish finders for 2025—including voice commands, 3D-printed parts, and setups built specifically for kayak anglers.
2025 DIY Fish Finder Trends
If you think DIY fish finders are just a mashup of old parts and duct tape, think again. The game’s evolved—and anglers are getting seriously creative in 2025. With better access to affordable tech, free software, and a booming online maker community, today’s homemade sonar systems are smarter, lighter, and way more efficient.

1. Smartphone-Only Rigs
This one’s exploding in popularity right now. Bluetooth-enabled castable sonar balls, like the Deeper START Fish Finder, are being reverse-engineered by hobbyists to work with open-source apps.
Why it’s trending:
- No need for a display or controller—just use your phone
- Lightweight and ideal for bank or kayak anglers
- Easy to recharge via USB
Some folks are even writing their own apps to pair with low-cost sonar sensors—so you can skip the pricey subscriptions that come with commercial fish finder apps.
2. Solar-Powered Builds
If you fish in remote spots or go on multi-day trips, this one’s a game-changer. A lot of DIYers are adding solar charging panels to their rigs, especially when using a Raspberry Pi or external battery pack.
Key parts to add:
- Flexible solar panels (attach to your kayak or gear bag)
- USB battery banks with charge control
- Waterproof 12V housing
Bonus: Some anglers are going fully off-grid with solar + Wi-Fi setups, where the sonar sends data to a phone or tablet over a hotspot—even with no cell service.
3. Voice-Controlled Modules
Yeah, you read that right. A few ambitious folks are integrating voice recognition using low-power AI modules or Raspberry Pi + ReSpeaker kits to allow hands-free control of their fish finder.
Why it matters:
- Adjust sonar settings without stopping to press buttons
- Great for solo kayak or canoe fishing
- Looks ridiculously cool
We’re not quite at “Hey FishFinder, show me where the bass are,” but give it a year.
4. 3D-Printed Waterproof Cases
Forget trying to retrofit an old Tupperware container. Makers are now designing their own waterproof fish finder housings using 3D printers and sharing the files online. These cases often include:
- Custom brackets for kayaks or float tubes
- Watertight seals with O-rings
- Cable ports for sonar and USB charging
Sites like Thingiverse and Printables are packed with free downloadable enclosures that look as good as commercial mounts.
5. Kayak-Specific Mounts
If you’re into kayak fishing, you know how annoying it is to mount stuff without tipping everything over. Enter: low-profile, DIY-friendly mounting arms, often made from PVC, aluminum rods, or printed parts.
Features to include:
- Quick-release transducer arms
- Compact battery trays
- Waterproof phone holders
DIY Trend Snapshot: What’s Hot in 2025
| Trend | Best For | Budget Range | Tools Needed |
|---|---|---|---|
| Smartphone Sonar Rigs | Shore & kayak fishing | $40–$90 | Phone, castable sonar |
| Solar-Powered Units | Remote lake trips | $60–$120 | Battery bank, solar panel |
| Voice-Controlled Modules | Tech tinkerers | $90–$150 | Raspberry Pi, mic array |
| 3D-Printed Waterproofing | Custom enclosures | $10–$50 (if printing) | 3D printer access, design file |
| Kayak-Friendly Mounts | Compact sonar rigs | $15–$40 | PVC pipe, clamps, marine adhesive |
Coming up next: We’ll compare DIY fish finders to commercial units—side-by-side—so you can see if saving money also means sacrificing performance.
DIY vs. Commercial: What the Tests Say
So let’s get down to it—how does a DIY fish finder really stack up next to something like a Garmin Striker 4 or Lowrance Hook Reveal?
We’ve seen plenty of tutorials, side-by-side videos, and field tests shared by anglers on YouTube, fishing blogs, and forums. The results? Pretty surprising, actually.
Let’s Break It Down
| Feature | DIY Fish Finder | Commercial Fish Finder |
|---|---|---|
| Price | $30–$100 | $120–$600+ |
| Sonar Accuracy | Decent in shallow, clear water; may struggle with deep or murky conditions | High-quality sonar with CHIRP, down imaging, and more |
| Display Quality | Depends on your setup—could be a basic LCD or a smartphone screen | Bright, daylight-readable screens with split views and GPS maps |
| Waterproofing | DIY sealant methods vary—risk of leaks in some builds | Professionally rated waterproof casings |
| Power Source | Typically uses rechargeable battery packs or solar panels | Built-in power cables with marine-grade batteries |
| Mounting Options | Custom rigs; often needs creative thinking for kayaks, canoes, or shore rigs | Pre-made mounts for boats and kayaks |
| Customization | Fully customizable—add GPS, Bluetooth, solar, or voice control | Limited to factory settings and firmware |
| Learning Curve | Moderate to high depending on electronics experience | Plug-and-play; good for beginners |
| Cool Factor | High for DIYers and tech enthusiasts | Professional, but not as “hands-on” fun |
Key Takeaways
- In shallow, calm water? A well-built DIY rig can hold its own.
- Fishing deep lakes or muddy rivers? Commercial sonar wins hands-down on clarity and range.
- Want to tweak and tinker? DIY is the way to go.
- Need something reliable for a tournament? Stick with the commercial models.
In a discussion on Reddit’s r/Fishing_Gear community, one user shared their experience:
“My homemade unit gave me almost the same data as my buddy’s Garmin—at 1/5 the price. But when we hit deeper water, it dropped out.”
This highlights the importance of considering your fishing environment and technical skills when choosing between DIY and commercial fish finders. There’s no universal solution; it’s about finding what aligns with your specific needs and budget.
Next up: We’ll walk you through how to actually build one—from the parts you need to the step-by-step instructions.
How to Build a DIY Fish Finder (Step-by-Step)
If you’ve made it this far, you’re probably thinking, “Okay, I’m in. Now what do I need?” The good news is—you don’t need a full-on workshop or a degree in electrical engineering. With some basic parts, a little patience, and a few YouTube videos in your back pocket, you can put together a working sonar setup in an afternoon.
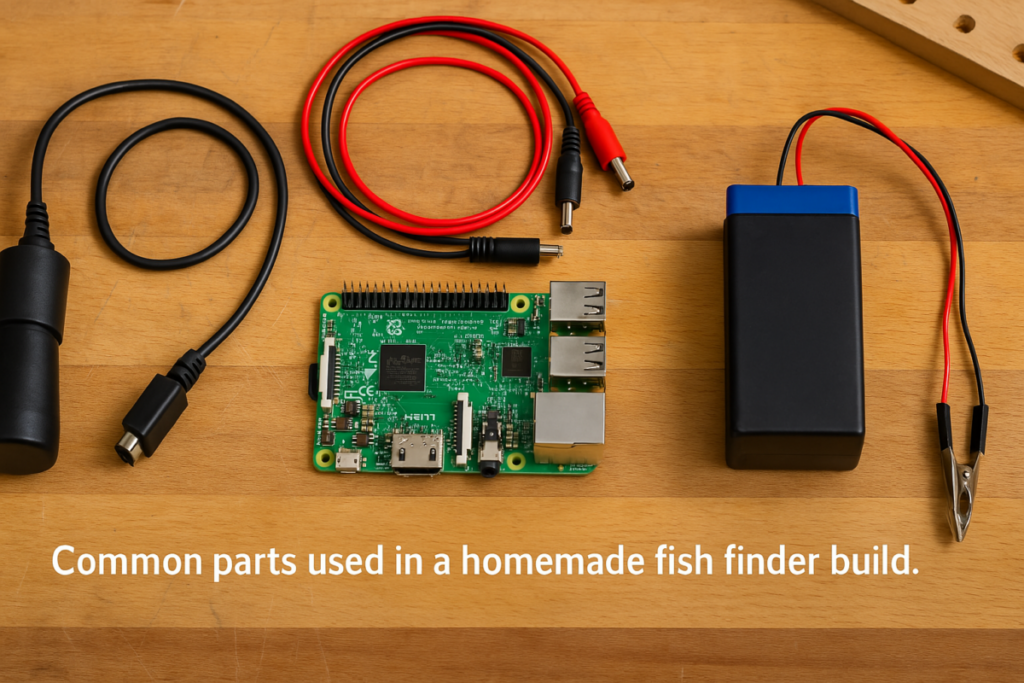
Materials You’ll Need
Here’s your starter kit checklist, with product suggestions to get you rolling:
- Sonar Sensor
HC-SR04 ultrasonic sensor (or similar) for simple builds
Or a more advanced Airmar-compatible sonar puck for better depth - Microcontroller
Raspberry Pi 4 or Arduino UNO R3 - Display
Small TFT LCD screen or use your smartphone with a Bluetooth adapter - Power Supply
Portable USB battery bank or rechargeable Li-ion battery pack - Waterproof Enclosure
Pelican-style case or 3D-printed housing with sealed ports - Miscellaneous
Jumper wires, breadboard, marine sealant, epoxy, double-sided tape or mounting brackets
Total estimated cost? Around $60 to $100, depending on what you already have lying around.
Step 1: Hook Up the Sonar Module
- Connect your sonar sensor to the Raspberry Pi or Arduino using jumper wires
- Power it with your battery pack or USB connection
- Use open-source libraries (like NewPing for Arduino) to get it sending distance data
Pro Tip: Start by testing the sensor out of water first. You should see changing distance readings in your serial monitor as you move objects closer or farther.
Step 2: Add a Display or Phone Connection
You’ve got two options here:
Option A: Onboard Display
Wire a small LCD to show sonar pings as a simple line or dot graph.
Option B: Smartphone Display
Use a Bluetooth serial adapter module to transmit the sonar data to your phone. Then view it through a terminal app or a custom mobile app.
Heads-up: Plenty of developers have shared Android-compatible code for this—search “DIY sonar Android app” on GitHub or Arduino forums.
Step 3: Seal It Up and Mount It
- Secure your electronics in a waterproof case
- Use marine-grade sealant around cable ports and sensors
- Mount the sonar sensor to your kayak, fishing pole, or a weighted float
Mounting Ideas:
- PVC arm attached to a milk crate
- Velcro + zip ties for bank fishing
- Suction cup transducer holder (can be DIYed with GoPro accessories)
Don’t forget: Toss in some silica gel packs to avoid moisture build-up inside your case.
Next up: We’ll go over the most common problems you’ll run into while building—and how to fix them without pulling your hair out.
Common Issues & Quick Fixes
Every DIY project comes with a few hiccups—and fish finders are no exception. The good news? Most problems are pretty minor, and once you know what to look for, you can fix them without starting from scratch.
Problem 1: No Signal or Inconsistent Readings
Symptoms:
- Sonar isn’t detecting anything
- Readings jump from 0 to 999 randomly
- Lag or delay in the output
Fixes:
- Make sure your sonar sensor is properly submerged and angled straight down
- Double-check all wiring—especially your ground and VCC connections
- Reduce signal noise by moving away from metal objects or electrical interference (like a trolling motor)
Problem 2: Condensation or Water Damage
Symptoms:
- Screen fogs up
- Rust spots on your wires
- Random shutdowns or disconnects
Fixes:
- Reseal your case with marine-grade epoxy or waterproof silicone
- Add silica gel packs inside your enclosure
- Use a waterproof cable gland instead of just drilling holes
Problem 3: Bluetooth/Phone Connection Drops
Symptoms:
- Signal disappears after a few minutes
- Phone won’t pair
- Data isn’t showing up in your app
Fixes:
- Use a more stable HC-05 Bluetooth module
- Avoid pairing multiple devices at once
- Mount the Bluetooth unit higher up (on your crate or vest) to keep it out of the water’s splash zone
Problem 4: Battery Dying Too Fast
Symptoms:
- Unit shuts off mid-trip
- Display flickers or stops
- You have to recharge after every use
Fixes:
- Upgrade to a larger capacity USB power bank (20,000mAh+)
- Add a solar charger panel to keep it topped up
- Keep your screen brightness low if you’re using an LCD or smartphone
Troubleshooting Cheat Sheet
Here’s a quick look at common problems and what usually causes them:
| Issue | Likely Cause | Quick Fix |
|---|---|---|
| No sonar data | Loose wires or incorrect sensor angle | Reseat cables; angle sonar straight down |
| Readings too jumpy | Electrical interference | Reposition away from motors or metal gear |
| Foggy enclosure | Moisture inside case | Add silica gel; reseal with waterproof epoxy |
| Bluetooth keeps disconnecting | Weak signal or interference | Mount higher; reduce nearby devices |
| Power issues | Low battery capacity | Use higher mAh bank or solar recharging |
The beauty of building your own gear is this: you learn by doing. Sure, a few things might go sideways. But when you fix them yourself, not only do you get back on the water—you come back smarter, more capable, and probably with a better story to tell.
Coming up next: Let’s take a look at real-life success stories from anglers who’ve built working sonar units for under $100—and what they learned along the way.
DIY Fish Finder Success Stories
Because Nothing Beats Catching Fish With Something You Built Yourself
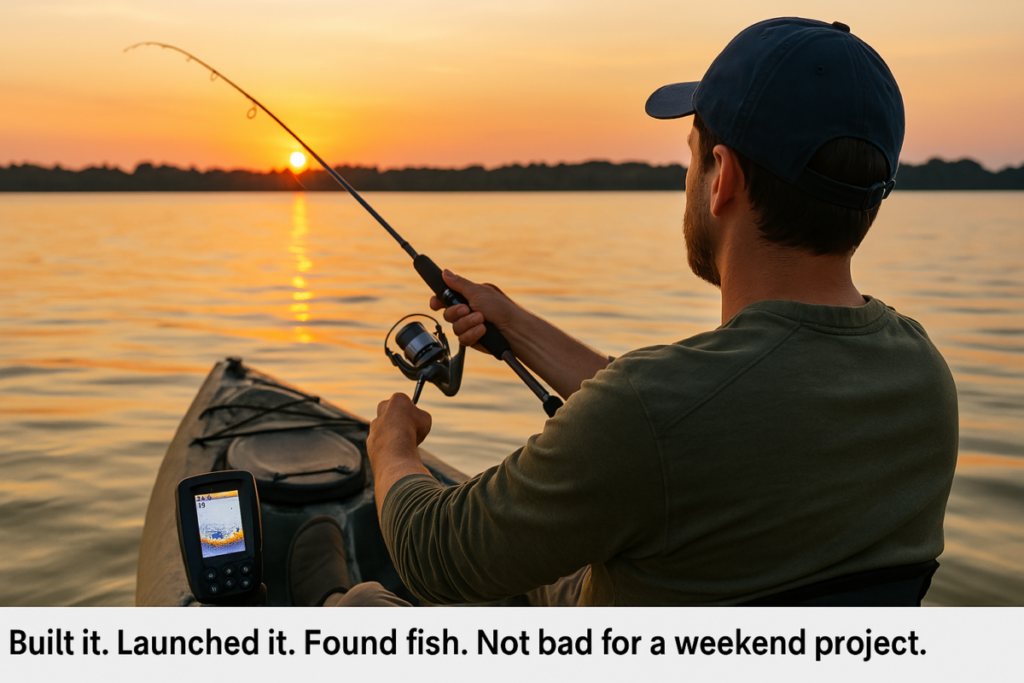
You know that feeling when something you cobbled together actually works better than you expected? That’s what we’re hearing from folks who’ve built their own DIY fish finders. They’re testing these rigs on the water, sharing the results, and—more often than not—coming back with a few fish and a good story.
These aren’t lab tests or product pitches. These are real people building their own sonar systems from scratch or salvaged parts—and in a few cases, out-fishing their buddies with store-bought gear.
1. Raspberry Pi + $50 in Parts = Fish on the Line
Over on the fishing-realm.com blog, one builder shared how they used a Raspberry Pi, a basic ultrasonic sensor, and an old phone to put together a sonar rig for under $50.
It wasn’t pretty—but it worked. They fished a small lake and got decent readings up to 10 feet deep. They did say it got a little sketchy when things got murky, but for casual freshwater fishing, it was “way better than expected.”
“It pinged structure right where I’d caught crappie before—so I knew it wasn’t lying.”
2. Custom Case for a Garmin Striker 4 (Because Ice Fishing Gets Cold)
If you’re using something like the Garmin Striker 4, you don’t have to go full DIY to make it work better for your setup.
One clever user on the Big Fish Tackle forum took a standard plastic toolbox and rigged it up with foam padding, battery storage, and cable channels to create a portable ice fishing sonar station. Clean, dry, and totally mobile.
Key takeaway: You can customize commercial gear with a little DIY attitude—and save money doing it.
3. Kayak Build with a Solar Charger and 3D-Printed Mount
In a step-by-step Field & Stream walkthrough, a kayak angler showed how they mounted a sonar unit to their sit-on-top rig, powered by a USB solar panel and a compact waterproof battery case.
They even 3D-printed a low-profile transducer arm that swings up when paddling shallow water.
It looked clean, worked well in calm water, and didn’t cost much to piece together.
4. Quick App Hack with a Waterproof Phone Case
For folks who just want the basics without drilling holes or soldering wires, there’s a simpler route. The team at Deeper makes a castable sonar puck that syncs with your phone via Bluetooth.
Some tinkerers have used similar hardware, paired with homemade floating mounts and open-source apps, to create their own versions—at a fraction of the cost.
“We didn’t even need a kayak mount. Just tossed it from the bank, watched fish pop up on the screen, and reeled it back in.”
Ready to try it yourself? Up next, we’ll help you figure out whether a DIY build or a store-bought fish finder is the better fit for your setup.
DIY or Buy? A Quick Decision Guide
So you’ve seen the builds, crunched the numbers, maybe even browsed a few Raspberry Pi kits on Amazon or bookmarked a sonar hack on Reddit. But the big question is still hanging in the air:
Should you build one… or just buy it?
The answer? It really depends on your budget, fishing style, and how much you like to tinker.
DIY is probably right for you if…
- You mostly fish in shallow lakes, ponds, or calm rivers
- You like hands-on projects and don’t mind learning electronics
- You want a custom setup (e.g., voice control, solar charging, kayak-specific mounts)
- You’re working with a budget under $100
- You don’t mind troubleshooting and experimenting a bit
Buying makes more sense if…
- You need deep water performance or advanced sonar features
- You fish tournaments, saltwater, or moving rivers where reliability is key
- You want plug-and-play gear that just works
- You prefer detailed maps, CHIRP sonar, or split-screen GPS
- You’d rather spend time fishing than fiddling with wires
Quick Comparison Summary
| Criteria | DIY Fish Finder | Commercial Fish Finder |
|---|---|---|
| Cost | $30–$100 | $120–$600+ |
| Time to Set Up | 3–5 hours (build + test) | 5–15 minutes (plug in and go) |
| Customization | Full control—add GPS, solar, even voice AI | Limited to model’s firmware and features |
| Reliability | Depends on build quality | High (especially for mid/high-end models) |
| Ideal For | Kayakers, tech tinkerers, budget-conscious | Boaters, pros, and anyone who wants “set it and forget it” gear |
Bottom line? There’s no wrong answer—just the one that fits how you fish.
If you’re up for a fun, money-saving challenge that gets you closer to your gear (literally), go DIY. If you’d rather hit the water with all the bells and whistles pre-installed, there are great plug-and-play options out there too.
Coming up next: We’ll wrap things up and answer some of the most common questions about building your own fish finder.
Frequently Asked Questions (FAQs)
Whether you’re halfway through your build or still deciding if it’s worth the effort, these are the questions that come up the most when it comes to DIY fish finders. We’ve answered them as clearly—and casually—as if we were talking shop by the lake.
Q1: Can a DIY fish finder match the accuracy of a commercial model?
Short answer: In the right conditions, yes—but don’t expect Garmin-level performance out of the box.
DIY sonar builds can provide solid readings in shallow, calm water (think ponds, still lakes, or coves). But if you’re fishing deep or dealing with muddy, fast-moving water, commercial units like the Lowrance Hook Reveal with CHIRP sonar are going to give you better clarity and range.
Pro tip: Use your DIY unit for scouting structure, depth changes, or bottom hardness—not pinpoint fish shapes 40 feet down.
Q2: What’s the cheapest working DIY setup I can build?
Some builders have pieced together sonar rigs for under $40 using just a basic ultrasonic sensor, an Arduino Nano, and an old smartphone. Add a cheap case and some marine sealant, and you’ve got a budget fish finder that works in shallows.
You won’t get GPS or a high-res display—but it’ll tell you if there’s something under your boat.
Q3: How long does it take to build one?
If you’re following a solid tutorial and have all your parts ready, expect about 3–5 hours from start to finish. That includes wiring, testing, casing, and mounting.
If it’s your first time using a Raspberry Pi or Arduino, give yourself a little more wiggle room to troubleshoot.
Q4: Is building a fish finder safe for beginners?
Yes—you’re mostly working with low-voltage electronics (5V or less). As long as you follow common-sense safety rules and keep water away from exposed wires during testing, you’ll be fine.
Start with a basic breadboard test before sealing things up, and don’t forget to label your wires. Seriously—it saves hours later.
Q5: Is it legal to use a homemade sonar fish finder?
Generally, yes—as long as your DIY device doesn’t interfere with protected frequencies or local regulations.
However, it’s smart to check your state or country’s rules around sonar use. Some competitions or public fisheries restrict certain tech.
Q6: What apps can I use to view sonar data from my DIY build?
If you’re sending data over Bluetooth or Wi-Fi, you can use:
- Serial Bluetooth Terminal (Android)
- Serial USB Terminal (Android/iOS)
- Custom-built apps from GitHub (search “DIY sonar app”)
You can also code your own visualizer using Python + Pygame or display sonar lines on a small LCD using Arduino libraries.
Next: Let’s wrap everything up with a quick summary—and an invite for your readers to share their own builds.
Conclusion: Worth the Effort? Absolutely—If It’s Your Style
If you’ve made it this far, you’re probably already thinking about your build—maybe even filling up your cart with a Raspberry Pi, sonar sensor, and a waterproof case. And honestly? That’s exciting.
DIY fish finders aren’t just about saving money—they’re about learning, experimenting, and getting more connected to your gear and your time on the water. Sure, there might be a hiccup or two (or three), but that’s half the fun.
Here’s what we know:
- DIY fish finders work surprisingly well in shallow, freshwater settings.
- They’re great for anglers who like to build, tweak, and improve.
- You can build one for under $100—sometimes much less.
- They won’t match high-end units in depth, clarity, or plug-and-play ease—but they’ll get you fishing with sonar your way.
So whether you’re into electronics, fishing on a budget, or just want a new project for the off-season—DIY sonar is worth exploring.
Now it’s your turn
Have you built your own fish finder? Got a rig you’re proud of—or one that flopped and taught you something anyway?
And if you’re not ready to build yet, bookmark this guide, follow one of the YouTube tutorials linked earlier, or grab a pre-built kit to get started slowly.
Tight lines—and happy building.
BONUS: Tools, Downloads & Extras for DIY Fish Finder Builders
Want to take your DIY build to the next level—or save this guide for when you’re at your workbench? We’ve got you covered with a few handy extras you can use right away.
1. Free DIY Fish Finder Shopping List [Downloadable PDF]
Print this checklist and take it with you to the hardware store—or use it to compare prices online.
- Editable, so you can track what you’ve already bought
- Includes “Nice-to-Haves” like GPS modules, voice kits, and solar panels
Click here to download the checklist PDF
2. Budget Calculator Tool
Want to estimate your total build cost before diving in? We’re working on a simple calculator where you can:
- Select parts from dropdown menus
- Add your own substitutions
- See real-time cost updates