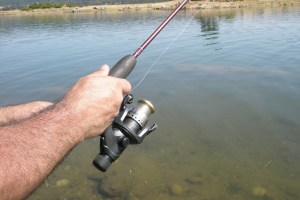
How to Paint a Fishing Rod: The Best Paint for Fishing Rods
The fishing rod you get online or from a store may have been designed to help you catch fish successfully, but they aren’t always the most exciting looking. If you are fishing often, you may want to work with something that is a little more fun to look at or can help you catch fish in different environments. One of the ways you can do this is by painting the fishing rod.
How do you paint a fishing rod?
- If you are working with an already painted rod, you will need to strip the paint before repainting.
- For blank rods, start by lightly sanding so that the paint will hold properly.
- Then you will want to use a primer to cover the rod completely.
- Finish the process with desired colors on top that will be long lasting if the primer was added clearly.
This article will cover not only how you should paint a fishing rod but the types of paint you should be using to do it as well. Whether you are repainting a rod that you don’t love the color of or are building a rod from a rod blank, you can leave the rod with a great finish in your desired color for all different preferences and fishing environments.
How to Paint a Fishing Rod
We will first address the steps you need to take to paint a fishing rod correctly. The goal of painting is to come out with a clean design that will be long lasting and not wear off. You may be painting from scratch on a blank rod or touching up paint on a rod that has faded or isn’t the color you want. We recommend painting the rod a color you will want for the long-haul.
The type of environment you are in may also impact the color you want your fishing rod to be. If you work at nighttime, maybe you’ll want some sort of light or neon colored paint that will be easier to see. A color that matches your environment or the color of the water may also be helpful in tricking certain types of fish so they cannot see the rod from above the water.
Repainting A Fishing Rod
Let’s first look at the steps you need to take if you are painting a rod that has previously been painted. This requires a few extra steps because you want the paint to successfully cover what is underneath while still holding on for it to last. You cannot simply paint over the old paint because it will not be able to hold onto the surface like the original coat did.
Steps for Repainting a Rod:
- Take guides off the rod: Make sure you take off all guides and anything that will interfere with the painting of the rod. This will give you better access to working with all areas of the rod.
- Stripping the old paint: You will want to sand down the old paint or take it off to the best of your ability to make sure the new paint has the greatest success of holding. These principles are similar to the process you would take for repainting an automobile. You can either take a stripping or a sanding approach to dull the paint. You can use any similar paint strippers that you would to a car, and even better if it is a more environmentally friendly one. Try to strip this down to a blank rod as much as you can.
- Primer: You can start with a base coat, called primer, to make the paint stay on more evenly and with greater strength. This can be 1-2 coats underneath your paint or one that is mixed in to a variety of paints. We will discuss the best paint options in the next section.
- New Coating: One of the easiest and best ways to get an overall even and successful repaint is to use spray paint. You will want to place the rod vertically so you can easily make your way around the entire rod while painting. Start with a light coat as a base so that there is no dripping and your paint will have a layer to stick onto. After about 20 minutes, you can add another layer of paint. Repeat this process about 3-4 times.
- Drying: You will want to give your rod ample time to dry. Keep your fingers and any foreign objects away from the rod while it dries. The rod should not be in direct contact with the sun, but still in a dry location.
- Gloss: If you want to add a glossy finish afterwards, make sure the coats of paint have completely dried. This may not be necessary if you prefer the matte finish of the paint you used, or the paint already has a glossed finish.
This is a fairly simple process that will just come down to your choice for materials and making sure you give the rod ample drying time between steps. You should be making sure your rod is completely dried and cleaned from stripping and sanding, priming, and multiple coats of paint before you add your hardware back on.
Painting A Blank Rod
It is much easier and more straightforward to paint a blank rod than repaint one that already had paint on it. You are starting with something fresh and won’t have to worry as much about the paint not sticking. A blank rod is often used when you are building a rod yourself.
Steps to Painting a Blank Rod:
- Taking away shine: Most blank rods will come with a shiny finish, and to get the paint to hold the best will require that you take away some of that shine. You can easily do this with a scuff pad that will take away this shine and also prepare the surface for priming. This leads to better adhesion for the primer you will need to put on. You don’t have to scuff too much, just enough to dull the surface of the entire rod. You should wipe off this excess before moving onto the next step.
- Priming: You will want to apply 2-3 coats of primer to the blank rod, so make sure it is fully covered. This will also depend on the paint you plan to put on after. If you are not adding another color, you can put on a few extra coats of the primer. Lighter primer should be applied if you are using another paint on top of it. You should let the primer dry for at least 4 hours to ensure it dries completely.
- Scuff again: You will want to lightly scuff the primer again with a scruff pad to prepare the surface for the next layer of paint. Make sure you get rid of all the excess material after scuffing so that the paint can be applied evenly.
- Apply new paint: You will want to apply 2-3 new coats of paint to your rod in the desired color. Make sure the first layer is light like in the repainting steps so that the next layer can easily hold on. You will want to wait 20 minutes between coats to give it time to set and then let dry overnight.
- Clear coat: You can add a clear top coat after to give the rod a finished look. This will make the rod appear glossy and also provide another layer of protection to enhance the durability of the paint on the fishing rod.
When you are painting the rod, it is recommended that you hang it vertically and work your way around with the paint so that nothing is touching any of the sides, and you have a clear visual on the entire rod. Using some string and attaching it from the top of the rod can be the easiest way to do this.
Repainting a rod and painting a blank rod follow similar steps with a blank rod being slightly easier to work with as it gives you a fresh base to work with. Repainting can just be extra work that you may not want to deal with, especially when the paint that is on there is in good condition.
The Best Paints for Fishing Rods
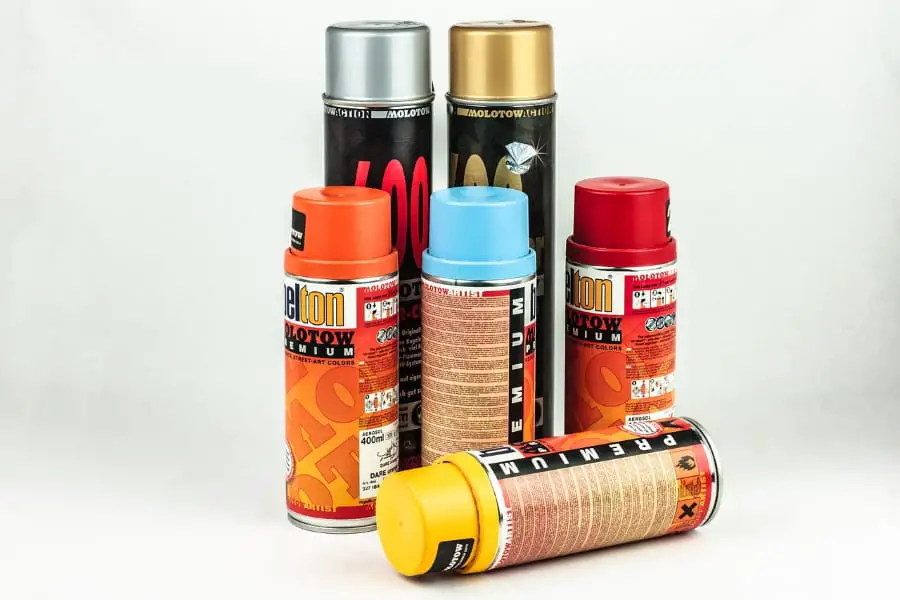
Now that you know how to apply paint to a fishing rod, let’s look at the materials and types of paint you should be using. The most popular types of paint are spray paints because they apply even coats. Many people will use auto paint as it holds onto the rod quite well.
Base Color Painting for Fishing Rods
These are the types of paints you should consider when painting a fishing rod:
- Automotive paint: Companies such as Plasticote sell products for auto paint and touching up in a can that do well on a fishing rod. These come in a wide variety of colors that are designed for finishing cars (so they are designed to last). They also often come in glossy finishes, so you may not need to use a glossy coat on top unless you want another protective layer or an additional finished look.
- Krylon Paint: This is a versatile paint that does not require any priming or sanding beforehand. It comes in a variety of colors and can be found easily online (see on Amazon) and in most hardware stores. It is meant to be long lasting and resistant to chipping, which is helpful when your rod may get banged up after extended use. This could take upwards of a week to dry completely.
- DupliColor Aerosol Paints: This is a faster drying paint that comes in a variety of colors. It is most similar to a lacquer. You can also use this brand for primers as well.
These come in a variety of colors, so you shouldn’t have to look much further at other brands or types. The ones mentioned above are well-trusted and work well for painting a fishing rod at varying drying speeds and consistencies.
Marbling Paint for Fishing Rods
After you have finished painting your rod to the desired color, you can get a little artsy and creative with it. Marbling has become a popular trend for added detailed painting to fishing rods with marbling pigment and epoxy finish. You can take this mixture and then add custom designs to your fishing rod.
There are multiple options for marbling pigment paint that are made in a variety of colors. To make a marbling pattern on your fishing rod, you will need to:
- Get the needed materials: This includes the marbling pigment, epoxy to mix, a dish for mixing, tools like toothpicks and spatulas for mixing and applying, and a dryer to rotate and dry the rod.
- Mix pigment and epoxy: You don’t need much pigment as it is highly concentrated. You can use this on the desired areas of the rod and drag with a toothpick to create unique designs.
- Water technique: Another cool technique is done by dipping the rod into water with paint in it, but this will limit where on the rod you will be applying color. Drop a couple drops of paint into the water and swirl before putting the rod component in the water and allowing the paint to form around the rod. You can let the rod dry once you have pulled it out of the water.
Using these marbling pigments and other smaller paints can add unique detailing to enhance the design and creativity of the rod for a new look. Here is a cool video showing you how people marble their fishing rods.
There are multiple techniques and approaches that artists and fishermen take toward decorating their rods.
Other Materials You Will Need for Painting
Beyond the paint itself, we have mentioned that there are other materials you will need when painting or repainting a fishing rod. These are necessary to do a complete and satisfactory job. These are some of the materials you should keep on your supply list when getting ready to paint:
- Primer: This is dependent on the type of paint you choose to use. Some paints may already have primer in them and will not require you to purchase this separately.
- Paint stripper: When you are repainting, you may choose to work with a paint stripper to remove the old paint. Citristrip and Rustoleum are two trusted brands that people use when working with their fishing rods.
- Scuff pad: To roughen up and take away finishes on the fishing pole, you will want a scuffing pad or similar material that can break down these coverings so you can easily paint a blank rod that may have a glossy finish.
- Clear coat: For a final coat to your fishing rod that will leave a glossy and durable finish, you should consider adding a clear coat after the paint has dried completely. This also comes in a spray form for ease.
- Safety materials: Because you are working with toxic chemicals that can stain, you will want to protect your lungs as well as the space you are working with. Using a painter’s mask is a great idea, especially since you will be using multiple coats of aerosols. You can also lay down tarp or newspaper below your space so that you do not stain the ground and surrounding area below the rod. Be sure to shield your eyes as well.
If you do want to add detailing and additional creative touches to your fishing rod, refer to the marbling section for the materials you will need. You can also use fine paint brushes if you are looking to paint on specific designs that are more specific than marbling.
You can choose to hold it firmly with brackets so that the rod cannot move while you are painting it or allow it to hang from a bar or tree by a string or other holding device. This is up to personal preference as to how you want to go about painting your fishing rod.
This video shows one strategy for painting a fishing rod yourself.
Painting A Fishing Rod
If you do choose to paint your fishing rod, you will want to make sure that you prepare the rod with the proper sanding and dulling so each coat will hold and durable. The greatest tip we can offer when using aerosols for painting is that each layer should be put on in moderation. The most effective strategy is to make each layer cover only 60-70% of the surface of the rod.
Each layer will add more and more to completion in an attempt to fully cover the surface without using too much paint that will sit and not dry easily. Being patient in your approach to painting a rod is necessary as there are multiple layers of paint needed to keep your fishing rod in good condition and avoid repainting in the near future.