Ice fishing for grayling – tips, techniques, and what to avoid
During the winter, one of the most calming, yet exhilarating hobbies is ice fishing, especially for grayling. This freshwater fish can be caught in the ice, but there are a handful of things you must know before you go. Grayling are like any other fish, but there are ways to increase your chances of catching them. No one wants to sit out on the ice without a bite, right?
How do you catch grayling through the ice? Once you’re prepared with everything you need, you need to find a good location, cut open a sizable hole, and be patient. A lot is required to catch a grayling through the ice, but the return is always rewarding.
We’ve done the research to help make your next ice-fishing trip for grayling a safe and rewarding one. We’ll discuss everything you need to bring along so that you are prepared for your fishing trip. Don’t go anywhere until you’ve read these tips and tricks for ice fishing for grayling.
Possible Dangers and Mistakes of Fishing for Grayling
First-time ice fishers may feel overwhelmed during their first couple of tries at this. After a few attempts, you will begin to figure out what works and what doesn’t. Hopefully, during this time, you are also aware of the potential dangers and mistakes that can happen while ice fishing. Here are a few of the most common mistakes people make:
- Lack of safety equipment- Anytime you are on a giant patch of ice, you are going to want to make sure you are prepared in the event of an emergency. One of the most dangerous things that can happen is falling into the water that is near-freezing temperatures. We’ve already talked about the importance of having a retractable ice pick on you at all times. Another great item to have is a float jacket that will keep you afloat.
- Lack of safety knowledge- In general, whenever you are outdoors, it’s important to be prepared for whatever happens. When ice fishing, you should have hypothermia supplies as well as a first aid kit. Knowing how to get out of an ice hole is important as well. Watch this video to see how it’s done:
- Not cleaning up- Once you are done fishing, it’s important to not leave any evidence of you being there. Throw away any food or trash to preserve the area. On top of that, cover your ice hole when you are done. If you don’t do this, other fishermen will know about your spot, potentially drying up the spot. Additionally, leveling the ice hole will reinforce the area, making it strong for the future.
- Improper clothing– One of the easiest mistakes first-timers make is not putting on enough clothes. To avoid this, step outside for a little bit once you’ve put all of your clothes on to make sure this will suffice for hours.
- Too many drill holes– It’s acceptable to try for another hole if the first one you attempted didn’t go as planned but be cautious for drilling too many holes. Doing this can weaken the ice of the area. It also will cause much more light to enter the water, scaring away fish. To avoid this, try to drill as few holes as possible, and leave a little slush on top of the hole as well.
Tips for Catching Grayling
Before we get into a general understanding on how to ice fish, it’s time to get into the detail of graylings, and how to catch them. These fish are closely related to the salmon but don’t put up as much of a fight as they do. Graylings don’t have any sharp teeth and are easy to handle. Although they taste amazing, most fishermen release them once they’re caught.
The Perfect Environment
The first thing you want to make sure of before hunting for grayling is that you are in the right area. Graylings require clean and cold water to survive. This fish is mostly seen in arctic regions in the northern hemisphere, such as Alaska, Canada, Russia, and some parts of the United States. Here’s our list of the best places to catch them.
Grayling will spawn in late spring or early summer, once the ice has started to vanish. During their developmental stages, they are often found in the pools of streams, fighting for food. Once cold weather approaches the area again, the fish take off and look for deeper water to survive.
The best time of year to catch grayling is during the summer when the fish are ready to eat. This isn’t to say it’s impossible to catch them during the winter. During winter, it’s better to look in deeper water than normal. The best time of day to catch grayling is typically between 9 am to 2 pm.
Knowing this type of information will increase the likelihood of catching a grayling. It’s also important to know exactly what kind of gear to use to catch these fish.
Special Gear for Grayling
Because grayling is a gentler fish than most, some certain tools and techniques would help fishermen catch these fish.
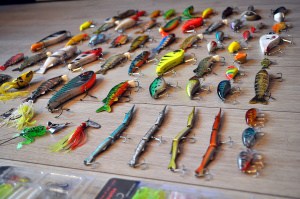
The best kind of rod to catch grayling would be a light spinning rod. Add small spoons and spinners onto your spinning tackle that are around 1 to 1 ½ in size. This may seem counterproductive for catching large grayling, but their small mouths make it difficult to latch onto big bait. Finally, use a 6-pound line to catch any grayling.
Don’t be afraid to use bright colored equipment to better see movement in the dark water. It’s also recommended to use these bright colors, such as orange, green, or pink, because graylings aren’t this color so they will be attracted to them.
Techniques to Catch Grayling
To catch graylings, you are going to want to have only about 6 feet of water below the ice. In the winter, you are going to want to add a few more feet to the line, mainly because the grayling is in deep water to survive the cold.
Another great tip to finding graylings is to look for salmon which are spawning. Graylings like to feed on the eggs of salmon as a way to survive. Although this task is a little more difficult during the winter, it will point you right towards graylings.
What You Need to Catch Grayling
Ice fishing is much more complicated than normal fishing. Other than the ice factor, there is a lot of different clothing and gear required to be successful. Before you go in fishing, make sure you gather up all of the supplies and other must-haves.
Licenses
The very first item needed to go ice fishing (or any fishing) is a fishing license. Luckily, all kinds of fishing require the same license, so if you already have on, then you are ready to hit the ice.
If you don’t have a fishing license, it’s very easy to get one. Simply head over to your state’s official fishing website and apply for one. While the process is relatively similar across the United States, each state has its policies and prices for distributing fishing licenses.
For example, each state follows its own calendar for when their fishing licenses are valid. Some states have their fishing licenses start on Jan. 1, while others have it starting in April or September.
Another big difference between each state is the cost of a fishing license. Currently, the most expensive license comes from California at $49.94, about 76 percent above the national average. Residents will pay less for applying for a license in their state, while most out of towners will be forced to pay extra for a license.
Check with your local area for definitive pricing, but here is what is on the U.S. Fishing and Wildlife person to find out the most up-to-date pricing, and the cost breakdown for annual licenses for each state.
Some of the Midwest tends to be on the low side, with Illinois at just $15 for residents and $31.50 for non-residents. Prices increase as you get out west and northwest, with Colorado at about $56 for a nonresident.
Clothing
Another big difference when going ice fishing is the type of clothes you wear. You aren’t going to be wearing the same outfit you would for normal fishing during the summer. You are going to want to dress in layers to stay warm.
- Starting from the ground up, you are going to want to make sure you have warm socks on, preferable high thermal socks to keep your feet dry and warm. Then you’re going to want waterproof boots that you’re comfortable in. Occasionally ice fishing requires a bit of walking, so being comfortable matters.
- Moving up, you’re going to want to keep your legs warm with some leggings or long johns. Make sure your first layer is thin. Stay away from cotton if possible and stick with polyester or wool.
- Next, you will need waterproof pants that are thick and durable. If still cold, add another layer in between, possibly sweatpants or jeans.
- Your torso area should sport the greatest number of layers. Start with a tank top and add a long-sleeve, preferably made out of wool or fleece. If temperatures are especially low add another sweater or jacket before your last layer. To top it off, you are going to want a thick waterproof jacket with a hood to protect you from any possible rain or snow.
- Finally, you are going to want to add some more accessories. Here are a few that will keep you warmer/ improve your outfit:
- Boot spikes
- Face mask
- Goggles
- Hand warmers
- LED headlamp
- Snow gloves or mittens
- Sunglasses
- Warm hat or beanie
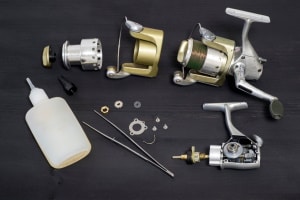
Gear
Now that you have your clothing figured out, it’s time to gather everything you need to catch a grayling through the ice. There are plenty of tools that will help you catch graylings, here is a quick checklist:
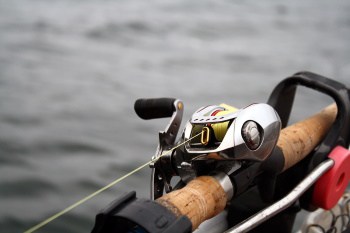
- Jigging rod and reel
- Bait
- Ice spud
- Ice Scoop
- Auger
- Tacklebox
- Tip-Up
- Ice pick
- Sled
- Bucket/ cooler
- Food and water
These are the basics to get started ice fishing. Each of them will help you catch grayling both faster and safer.
Tools
- The first tool you will likely be using is your ice spud, which is used to better navigate the ice. Use this tool to tap the ice as you walk. Listen for hollow hits that could indicate the ice is thin and could break. Use a sled to make it easier to carry everything as you find a good fishing spot.
- A gauge. Once you find a spot and have everything set up, you are going to want to use your auger to create a hole in the ice. Augers can be gas-powered, electric, or hand-powered. Either way, they all perform the same function. Use the ice scoop to remove the snow that builds up around the hole.
Tacklebox Items
You are almost ready to start fishing. Now, it’s time to prepare your catching set-up. For this, you will need your fishing rod and reel, along with proper bait attached to the fishing rod. All of your supplies should be inside your tackle box, including tools, bait, and other resources. Here are some common items found in a tacklebox:
- Bait
- Bug repellent
- Compass
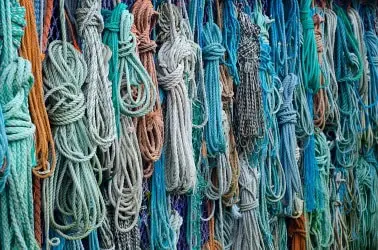
- Extra fishing line
- Fingernail clippers
- First-aid
- Flashlight
- Floats
- Hooks
- Knife
- Lures
- Needle nose pliers
- Scale
- Screwdriver
- Surgical clamp
- Swivels
- Weights
Other Helpful Accessories
Once your fishing gear is ready to use, set up a tip up on the surface of the ice. A tip-up will notify the fisherman of a catch by a flag or bell that will signal when a fish takes the bait. These aren’t necessary but are useful. An alternative for this would be to simply dig a hole in the ice so that your fishing rod can be held up on its own.
A retractable ice pick should be brought just in case anything wrong happens. You should always go ice fishing with a friend. It’s possible to fall through the ice, and a retractable ice pick will make getting out much easier.
The last couple of things on this list that are necessary are food and water. Most often, ice fishing takes hours. You are going to want to replenish your fuel by bringing the proper food and drinks with you. Here are a few suggestions to keep you satisfied all day:
- Beef Jerky
- Chips
- Fruit
- Energy bars
- Nuts
- Sandwiches
How to Fish Through the Ice
Finally, you are ready to start fishing! Now it’s time to get to the dirty work and find the best place to find graylings. There’s still a lot to consider when you’re on the ice, such as water depth, choice of bait, and location.
Finding a Good Location to Fish for Grayling
Finding the perfect place to ice fish can happen months before there’s even snow on the ground. Advanced fishermen will observe local spots while the water is still flowing. Understanding the local geography can put you in front of the rest of the competition.
Fish typically like to congregate in areas where there is a lot of food, such as where a river leads into a pond or lake. Springs are another great place to find fish for the winter. If possible, try to get an idea of what’s underwater to better help you. Fish like to be near rock piles, deadfalls, ledges, and edges to avoid predators.
You can figure all of this out by going out on the water by yourself before the water freezes and gauge the depth with a sinker. You can also use fish finders or portable sonar devices to find fish.
As winter comes around, hopefully, you have a good location to do some ice fishing. Load everything into your sled and start walking with your ice spud in hand. This tool can also help you determine thick layers of ice that could be a potential fishing spot.
Cutting the Hole
Once you’ve found a spot where you believe the ice is thick enough, cut out a small hole and measure the thickness of ice before doing anything else. The best way to measure the hole is by using a tape measure and hooking the lip onto the bottom of the ice.
5 inches is the minimum thickness needed to safely ice fish. Anything less than that should be avoided, especially with heavy equipment. 5 inches is enough to hold a snowmobile on the ice. If you’re nervous, just know that 8 inches can support a car.
After you have determined the ice is thick enough, it’s time to use your auger to create a large enough hole to fish from. Whether you are using a hand-powered auger or an electric auger, be sure to hold it very firmly. The last thing you want is your auger to get stuck in the ice, and you let go, with the auger spinning in the same place.
1. Hold the auger perpendicular to the ice and begin to twist the tool into the snow. This will take practice and strength. If you mess up your hole, you can move a couple of feet over and try again. Try your best to keep the number of holes to a minimum. The more holes in the surface, the weaker the ice will get.
Another tool you can use that will help create a big enough hole is an ice chisel. These can cut through 6 inches of slow with a sharp blade. Realistically, you only need to cut the hole about 1 foot in diameter.
2. Once the hole is made, cover the hole with a removable lid. This is done for multiple reasons. First, it’s to protect the uncovered water from freezing again if you are away from the hole. It’s also a safety measure in case anyone gets too close to the hole. Finally, it’s to avoid the hole from any obstructions, such as if it were still snowing or raining.
3. Before you set up the rest of your fishing station, be sure to check the depth of the water. The deeper the water, the more likely you are to catch fish. To figure this out, use a sinker at the end of your hook and let it fall to the bottom. Gauge the depth by how long you have to take to reel the line back up.
Fishing Set-Up
Next is to set-up your fishing station. Whether or not you plan on sitting a lot during this fishing trip, it’s best to set up everything around you so that it’s easily accessible:
- On one side of your sitting area, you should have your tackle box. On that side, you can find your bait, tools, and anything else you need before you throw your line in the water.
- On the other side of your sitting area should be where the fish go once they’re caught. Here you should have your bucket or cooler ready for any incoming fish. On that side, you are also going to want any necessary tools to kill the fish before you put it in your bucket.
If you are not someone who likes to sit around and wait for fish to bite, you can set everything up away from the hole and simply rely on a tip-up to notify you when a fish is on the line. It’s sometimes best to set-up away from the hole to avoid any accidents or injuries.
Now, all you have to do is enjoy the rest of the day and wait for some fish nibble on your bait. This is also the perfect opportunity to crack open a cold one and eat a snack.
Fishing Techniques for Catching Grayling
To the average person, fishing looks like the same technique no matter what environment you are in. The reality is there are different ways you can fish while out on the ice. These can impact how many fish react.
Standard Technique
The first technique is the one most people think of, where you sit and wait. The fisherman takes the bait and lets it fall towards the bottom of the water and slowly reels the line back in until a fish takes the bait. This is a very standard and can yield decent results.
Another way is by changing motion. Most fishermen rely on a vertical motion to capture fish. To change up the motion, try moving in a horizontal range to attract fish. This will require a bigger hole but will make the fish more interested.
Jigging Technique
If these slow motions aren’t working for you, you can try a technique called jigging. This is when you let your line sink to the bottom of the seafloor and then slowly jump the line back up. You can jig the line horizontally or vertically but be sure to be smooth with the jerks. Jerking the line too fast will alert the fish and steer them away from you.
Tightlining Technique
The last way you can ice fish is by tightlining. This technique is best done with a tip-up but can be done without any tools. To tight line:
- Hook-up a decently heavy lure on to your rod and let the rod sink to the bottom of the water. Make sure the lure isn’t too heavy because you are going to want to see movement if a fish nibbles on it.
- Once the line is at the bottom of the water, you want to keep a close eye on the line. Since the water is much calmer in this area, you will be able to see any movement on your line, potentially signaling a fish on the line.
To increase your chances of a bite, no matter how you are fishing, is to chum the water. Chumming is the process of taking a handful of live bait and throwing it into your hole. As the bait falls towards the bottom, more fish will come towards that area, increasing your chances.
All of these techniques have been proven to be successful when ice fishing but try to use all of them for the best results.
Getting Ready to Catch Grayling Through the Ice
Catching grayling through the ice isn’t nearly as difficult as it may seem. There is a lot of information to understand before you even hit the frozen lake, but all of this will help you catch your first grayling.
Remember to check your gear twice before heading out, and don’t forget snacks and water for yourself. Once you find a great place to set up, organize your area best you can and remember all of the tips and techniques you read about in this article.
It will take some time to get the hang of all of the equipment and to understand all of the techniques of fishing, but once you do, it will make the experience much more interesting.
Fishing requires a lot of patience and focus, but if done correctly, you will have yourself a relaxing afternoon catching delicious grayling all day long.