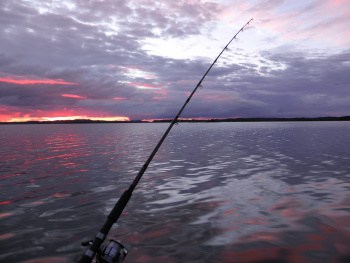
Troubleshooting a Stiff Fishing Reel
So you’re noticing that your fishing reel is feeling a bit stiff or not functioning correctly? Well, not to worry. There are some easy things that you can do to troubleshoot your reel. Follow along as we break it down for you.
How do you troubleshoot a stiff fishing reel? The steps to troubleshoot your fishing reel include:
- Disassembling the reel
- Marking each part
- Finding and replacing the worn-out parts
- Applying grease
- Re-assembling the reel
- Changing the leader
Now before we get into the troubleshooting steps, let’s go over all of the materials that you are going to need.
Materials That You Will Need
For basic troubleshooting, you will need to gather a few tools:
- Water
- A clean towel
- Cleaners and lubricants
- Wrench
- Screwdriver
- Tweezers
- Toothbrush
- Cotton swabs
Water
The first thing you’ll need to troubleshoot your stiff reel is water. Water will help remove the dirt and grime from the internal parts. It’s also a good idea to always rinse your reel with fresh water after you’ve been fishing all day to get the salt and debris off. You can use your regular garden hose for this. Or you can soak the reel in a bucket of water.
Clean cloth
You will also need a clean cloth or a towel. You want something soft and absorbent. The towel is essential because it will dry off any excess water before you try to apply the lubricant. This is a crucial step that you can’t skip. Be careful that you don’t mix oil or lubricants with excess water on the reel. Otherwise, you could ruin the overall performance of your reel.
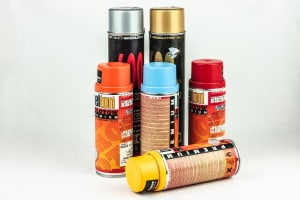
Cleaners and lubricants
You’ll also be using cleaners and lubricants. There are several types of these products available on the market. You can try Ronsonol lighter fluid or Simple Green (available on Amazon) cleaning compound.
Personally, I like to use Penn Rod and Reel Cleaner (click to see on Amazon). I also really like the Penn Angler Pack (on Amazon). This product contains synthetic reel oil and precision reel grease.
But any product that can eliminate contaminated grease and oil will work fine.
Wrench
A wrench is another tool that you’ll need to troubleshoot your stiff fishing reel. This tool is used for loosening up the nuts. Any wrench that you have on hand will work as long as it matches up with the size of the nuts on your reel. I recommend using something like an 8 in 1 Reel Handle wrench. This tool includes eight popular sizes for dealing with nuts. And it fits all of the handle nuts for most fishing reels, including Daiwa, Abu, Shimano, and Penn.
Screwdriver
You will have to check with your equipment to see what type of screwdriver you will need to disassemble and assemble your fishing reel. Some require a Phillips, and some require a flathead. You may need more than one size of screwdriver too, because many manufacturers use various sizes of screws. We like this ratcheting, multi-bit screwdrivers (click link to see price on Amazon).
Tweezers
Next, you will need some tweezers. Tweezers are helpful for picking up and taking care of tiny parts like the reel springs and wire clips. They will help you to get all of the little parts back into the correct position. You don’t need anything expensive or fancy. Just a regular old pair of eyebrow tweezers will work fine.
Toothbrush
We’ll be using a toothbrush today too. The toothbrush is excellent for removing stubborn grime and dirt. It’s also useful for getting to the hard-to-reach parts of your fishing reel.
Cotton swabs
Finally, you will need some cotton swabs. The cotton swabs will help you to apply the grease. You can also use them for cleaning around the tight areas of the fishing reel.
Troubleshooting Your Reel
Today we’re going to go over six steps that you need to do to troubleshoot your stiff fishing reel.
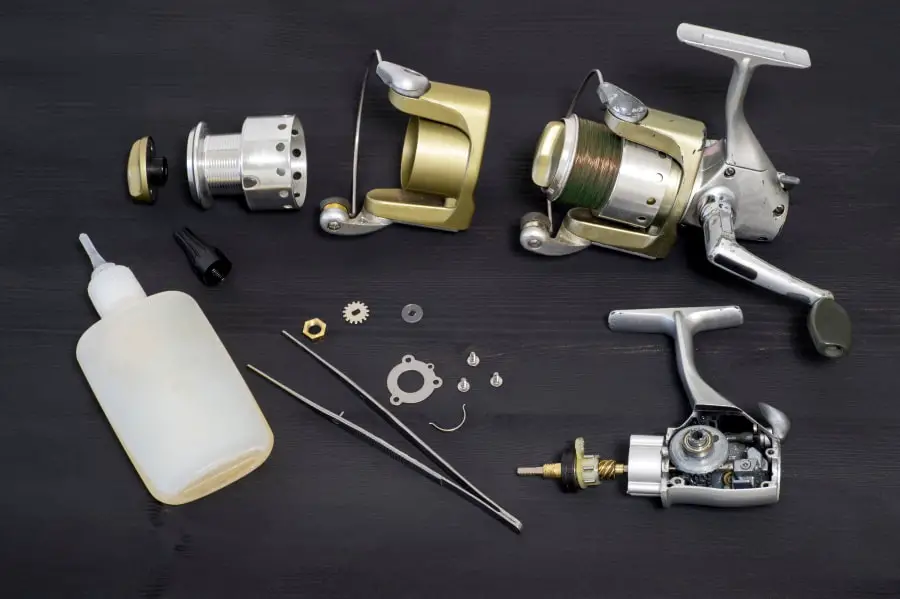
Disassemble your reel
Okay, now it’s time to take the reel apart. This step may make you feel nervous at first, but stick with me, and you’ll be fine. Before we get started, you need to know that all reels are not the same. Different reels have different parts. So it’s best to check with your owner’s manual. This is especially important if you’re doing this for the first time.
Things that all reels have in common include the spool, drag, and handle. You will be taking those apart.
One word of caution is that you should be careful not to forget where each part goes on your reel. I like to use my phone to take a picture at each step before I remove something and recommend arranging all of the reel’s components from the first thing you removed to the last. Lay all of the parts out in a line on your table or bench. This step will help you later to put the reel back together correctly.
Mark each part
The next step is to mark each part. You can use masking tape under each component. You should write a number on the masking tape beneath each piece, telling you which parts you took out first and which you took out last.
Be very careful with the screws. Tiny screws can turn your project into a huge headache if you forget where they came from. You are also going to find different size screws so it can get confusing to remember where each one goes. For this reason, we recommend numbering each piece, including every little screw, or keeping them with the part.
Find the parts that have worn out and replace them
As you disassemble the reel, you will quickly see which parts are causing your reel not to work well.
Most fishing reels today are made of very durable materials. You will likely find that the parts you need to replace are the plastic parts. Often times when your reel gets stiff, it’s because of faulty plastic pinion yokes. The brake shoes and clutch cam are two other parts that could be a problem.
The next thing that you need to do is to check the line guide and the drag washers. If you fish often, then it’s a good idea to keep a stock of these materials. You never know when your fishing reel will encounter an issue.
All of the other parts of your reel are metal. And they take a lot longer to wear out.
Apply grease
Next, you’re going to clean your fishing reel using lubricants like grease. You can use the toothbrush and cotton swabs for this or any other small soft brush you happen to have. The point is to avoid damaging the plastic components and fibers of the reel.
When you apply the grease, you should make sure that you get it beneath the teeth of the gears. If you put the grease on top of the teeth, it will scatter. When you clean the bearings, you should use lighter fluid or cleaner. Giving them a quick spin will let you know when they’re clean.
Don’t forget that you need to use a towel to clean and dry off the internal parts of the fishing reel before you apply any lubricant. This is because grease doesn’t mix well with excess water.
A quick note of caution is that you should use oils and lubricants in a well-ventilated space that is far from anything that could be flammable. You want to be cautious about breathing in the fumes of these chemicals. You should also be sure not to get it in contact with your eyes.
Re-assemble the reel
Now is the time that you’ll appreciate having all of the parts numbered. Simply follow the sequence of numbers on the tape and put each part back in its place.
Be sure that you use the proper tool with each part of the reel. You will need your wrench to loosen the nuts, and you will need your tweezers to handle the springs and wire clips. Some people like to use impact drivers for easier loosening of the screws. But you’ll do just as well using a traditional screwdriver.
Change the line
Now for the final step. This step involves the spinning of the bail to load the spool. You can’t do this step until all of the parts of your reel are put back together.
You should replace your old worn line with new line in a similar amount. Then allow the line to pass through the guides in the eyes of the rod. Be sure to use every guide.
You should attach the new line after you open the bail of the fishing reel. After you do that, you should close the bail. Put the spool down and begin spinning the bail. Be careful both to neither underfill or overfill. Continue loading your reel until it is about 0.125 inches away from the rim.
Here are some excellent videos to help you with this step. If you are using a spinning reel, watch this video:
And if you are using a baitcasting reel, then watch this one:
A Final Thought
I hope that this article has given you the tips that you need to troubleshoot and clean your fishing reel. The steps that we went over will not only help you to fix your reel, but it will also save you a lot of money if you have to send the reel in for repairs.
Thorough cleaning and proper maintenance will extend the life of your fishing reel. And that means more angling fun for you!